Building structures
Building structures can consist of a BLOCK, HANGAR, HANGAR2, HANGAR3, or TANK or any combination of them. Any texture listed in the file (Orbiter\Config\base.cfg) can be used for textures in these structures, but many may not be appropriate for them, such as Runway1.
A BLOCK is an object that can be used to create structures on bases. It is a cube or rectangle consisting of three dimensions, length, width, and height.
A HANGAR is an object which consists of four sides, and a roof that is semicircular, sorta like half of a barrel. The roof takes up about the upper half of the height, the lower half is wall.
A HANGAR2 is an object which consists of four sides, and a peaked roof, much like a house. The roof takes up about the upper half the height, the lower half is wall.
A HANGAR3 is an object which consists of a barrel-shaped roof, much like the HANGAR2, but the roof reaches to the ground, there are only two walls, front and back.
A TANK is a structure that is circular of elliptical with a flat roof.
If you have not read the article Creating a simple base for information on how to build a base, I suggest you do so. Orbiter's description for how to build objects is located in Orbiter\Doc\OrbiterConfig.pdf.
The description of a block is written into the config file of a base (Orbiter\Config\<Planet>\Base\<BaseConfig.cfg>).
Textures
Textures used for building these structures are found in the directory Orbiter\Textures and are listed in the file Orbiter\Config\Base.cfg. Note that there are a number of textures in the \Textures directory that are not listed in the Base.cfg file that could be used, so, if you like type in the filename without the extension into the Base.cfg file so you can use them in building structures, such as Door01, but, not, let's say, Runway01.
Open the Bonneville.cfg file (Orbiter\Config\Earth\Base\) that we created in the article Creating a simple base in your favorite text editor such as Notepad or Notepad+. Place your cursor at the end of the line BEGIN_OBJECTLIST and press Enter. That provides a line to type in an object.
BLOCK
    POS 0 0 -50
    SCALE 1 1 1
    ROT 330
    TEX1 0 0 0
    TEX2 0 0 0
    TEX3 0 0 0
END
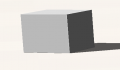
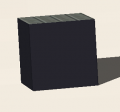
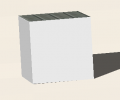
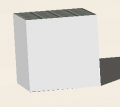
Save the file, you can keep the file open as we will be editing this BLOCK. Exit the scenario, then re-launch it. Now, you will see a small cube sitting on the ground about 50 meters in front of you. In the scenario editor, change the time to about 16:00 hours, that puts the Sun behind you so you can see what effect shadows have.
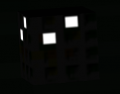
Now note this BLOCK is white on the side facing you. If you moved your ship so you could see one of the sides, you will note that it is gray. Orbiter applies shading for shadows.
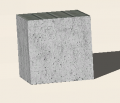
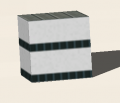
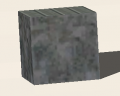
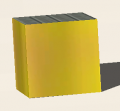
The BLOCK should look something like this:

This BLOCK is a cube 1 meter cubed. Now, let's edit the BLOCK in Bonneville.cfg as follows:
BLOCK
    POS 0 0 -50
    SCALE 1 1 1
    ROT 330
    TEX1 Fcd01 1 1
    TEX2 Fcd03 1 1
    TEX3 Roof01 1 1
END
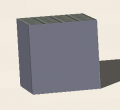
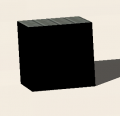
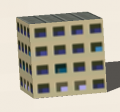
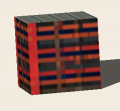
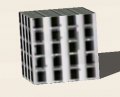
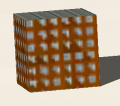
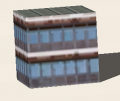
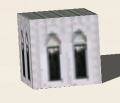
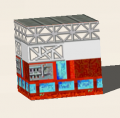
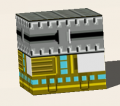
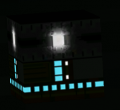
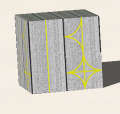
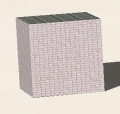
Again, save the scenario, exit to the Launchpad and re-launch. Now, your BLOCK should look like something like this.

Fcd01 produces a wall with four windows wide and four windows tall all into that one meter square side, and Fcd03 produces a wall with three sets of windows wide and three tall. The number of items produced on a face vary from one to another Fcd.
Components of a BLOCK
When building a BLOCK, the first line must be BLOCK.
The next line describes the position of the BLOCK in relation to the center of the base. If you type POS 0 0 0, the center of the BLOCK will sit right on the center of the base.
For the position parameter, POS must be the first part of the line.
The first number X is the distance north or south of center of the base (north is -, south us +) in meters.
The second number Y is the elevation above the terrain or base plane the bottom of the BLOCK sits, above is +, below is -. This can be useful if you need to put one BLOCK on top of another to build a complex structure.
The third number Z is the position in meters east +, or west - of the center of the base.
The next line starts with SCALE. This indicates the size of the BLOCK in the X, Y, and Z axis. So, if you type in SCALE 1 2 3, that makes the BLOCK 1 meter wide, 2 meters tall, and 3 meters front to back. Orbiter will stretch the texture to fill the dimensions called out.
The next line is ROT. At ROT 0, the front of the building is facing East, positive ROT is clockwise in degrees, range is 0-360.
The next line is TEX1followed by three parameters, the first 0 or which texture is called out from Base.cfg, the first number is how many iterations of the texture is squeezed into the width, and the third number is how many iterations is squeezed into the height. This applies to the front face and the back face of the BLOCK.
The next line is TEX2 followed by three parameters, the same as TEX1, but applies to the left and right faces of the BLOCK.
The next line is TEX3 followed by three parameters, the same as TEX1 and TEX2, but applies to the top, or roof of the BLOCK.
The first term of each TEX callout is the name of a texture from Base.cfg. Any one can be used in each, but, using Runway1 or Lpad02 would probably not be appropriate.
Now, let's build two BLOCKs each with different parameters and compare.
Replace the existing BLOCK with the following:
BLOCK
    POS  0 0 -50
    SCALE 1 2 3
    ROT 330
    TEX1 Fcd01 1 1
    TEX2 Fcd01 1 1
    TEX3 Roof01 1 1
END
BLOCK
    POS -4 0 -50
    SCALE 1 2 3
    ROT 330
    TEX1 Fcd01 1 2
    TEX2 Fcd01 2 1
    TEX3 Roof01 2 2
END
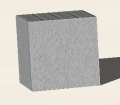
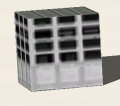
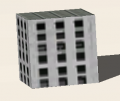
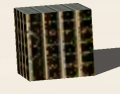
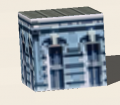
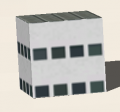
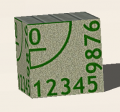
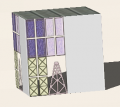
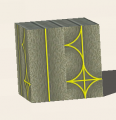
After launching Orbiter, you will see two BLOCKs, the same size, both use Fcd01 for all sides, but the windows are different.
For the left BLOCK, SCALE 1 2 3 creates a block 1 meter wide, 2 meters tall, 3 meters deep. TEX1 Fcd01 1 1 creates one Fcd01 wide, 1 Fcd01 tall stretching the Fcd to fit the height. The same with TEX2 and TEX3, TEX3 calling out a Roof design.
For the right block, SCALE 1 2 3 does the same, but TEX1 Fcd01 1 2 creates one Fcd01 wide and two Fcd01 tall making twice as many windows. TEX2 2 1 creates four windows high and eight windows wide on the side faces. TEX3 2 2 creates a roof with twice as many seams.
A TEX parameter can use decimal numbers in the second and third parameter. For example, TEX1 1 1.5 will get you 1.5 times as many Fcd01 tall, which creates 6 windows tall. Remember each Fcd entity may have different number of windows or doors, etc., so you need to vary the math.
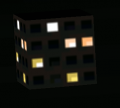
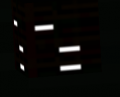
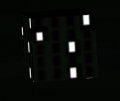
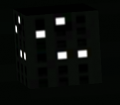
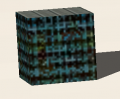
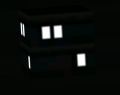
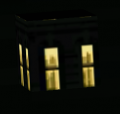
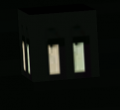
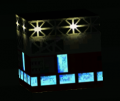
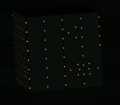
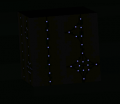
Also, note that many of the textures, particularly Fcd ones will have a texture for daytime and another for nighttime, showing some lights through the windows. You can see this by changing your time of day in the scenario to nightime, let's say 04:00.
Components of a Hangar
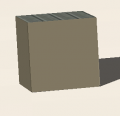
Let's change the BLOCK you have in Booneville.cfg to a HANGAR, it looks like this.
HANGAR
    POS 0 0 -50
    SCALE 1 1 1
    ROT 330
    TEX1 Roof01 1 1
    TEX2 Roof01 1 1
    TEX3 Roof01 1 1
END
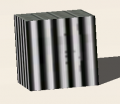
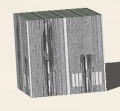
Your HANGAR should look something like this:

The term POS is the same as for BLOCK, position in meters from the center of the base, the first number is North- or South+, the second is elevation above ground, the third East+ or West-.
The term SCALE is the dimensions in meters, left to right, then height, then front to back.
ROT is in degrees from East going clockwise.
TEX1 is the texture used for the front and rear walls, TEX2 is the texture used for the front and rear walls, and TEX3 is the texture used for the roof.
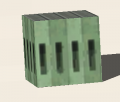
This Hangar has a SCALE of 10 5 15, TEX1 and TEX2 is Roof01 5 1, note that there are 5 times as many ribs on the width of the front face.

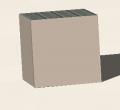
Components of a HANGAR2
A HANGAR2, which looks like a house with a peaked roof
HANGAR2
    POS 0 0 -50
    SCALE 1 1 1
    ROT 330
    TEX1 Roof01 1 1
    TEX2 Roof01 1 1
    TEX3 Roof01 1 1
END
Gallery
In my Block.cfg I have added all textures from the Orbiter\Textures\ folder that can be used for blocks and shown below including night views where appropriate. So, you don't need to keep making different ones in your base to see what they look like. These blocks will be 1 meter each dimension. You can scale as needed in your base. Note: Any blocks that are visible at night have a nighttime view, but, any blocks with no nighttime view are essentially invisible at nighttime.
-
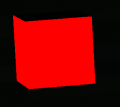
Block with no textures
Daytime -
Ball
Daytime -
Ball2
Daytime -
Ball3
Daytime -
Cape17
Daytime -
Cape18
Daytime -
Cape19
Daytime -
Cape20
Daytime -
Cape21
Daytime -
Cape22
Daytime -

Cape23
Daytime -
Cape23
Nighttime -
Concrete
Daytime -
Concrete1
Daytime -
Door01
Daytime -
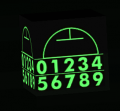
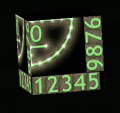
Fcd01
Daytime -
Fcd01
Nighttme -

Fcd02
Daytime -
Fcd02
Nighttime -
Fcd03
Daytime -
Fcd03
Nighttime -
Fcd04
Daytime -

Fcd04
Nighttime -
Fcd05
Daytime -
Fcd05
Nighttime -
Fcd06
Daytime -
Fcd06
Nighttime -
Fcd07
Daytime -
Fcd08
Daytime -
Fcd09
Daytime -
Fcd10
Daytime -
Fcd11
Daytime -
Fcd11
Nighttime -
Fcd12
Daytime -
Fcd12
Nighttime -
Fcd13
Daytime -
Fcd13
Nighttime -
Fcd14
Daytime -
Fcd15
Daytime -
Hangrail
Daytime -
Hangrail
Nighttime -
Lpad01
Daytime -
Lpad01
Nighttime -

Lpad02
Daytime -
Lpad02
Nighttime -
Lpad02a
Daytime -
Lpad02a
Nighttime -
Monorail
Daytime -
Monorail
Nighttime -

Roof01
Daytime -
Roof02
Daytime -

rough1
Daytime -
Runway1
Daytime -

Runway2
Daytime -
Solpanel
Daytime -
Taxiway1
Daytime -
Taxiway1
Nighttime -
Taxiway2
Daytime -
Taxiway2
Nighttime -
tile1
Daytime -
visor
Daytime -

Wall01
Daytime -
Window01
Daytime


